Setup Doremi
This guide describes how to automate a Cinemataztic show in a Doremi setup in a 3 step process:
- Doremi setup
- Macro setup
- Testing
1. Device setup
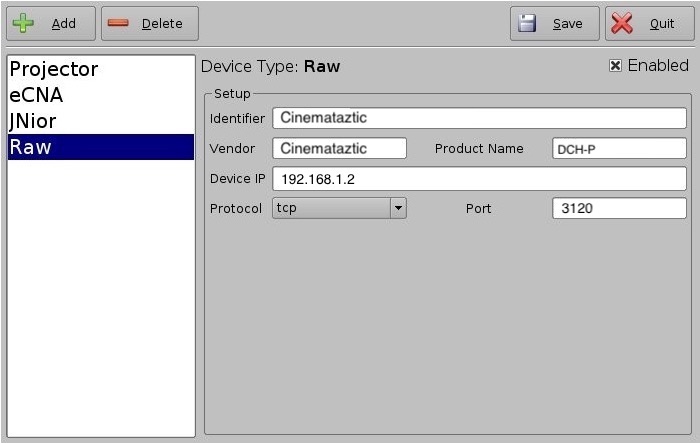
- Open Device Manager
- Add new device of type “Raw”
- Add device information
- Input the (fixed) IP address the device will receive cues on.
- Port (defaults to 3120), unless otherwise specified in the cloud admin interface
- Device is now ready to receive cues
It is a good idea to have set up the machine to have a reserved IP address on the networks DHCP server, to ensure it has the same address between reboots.
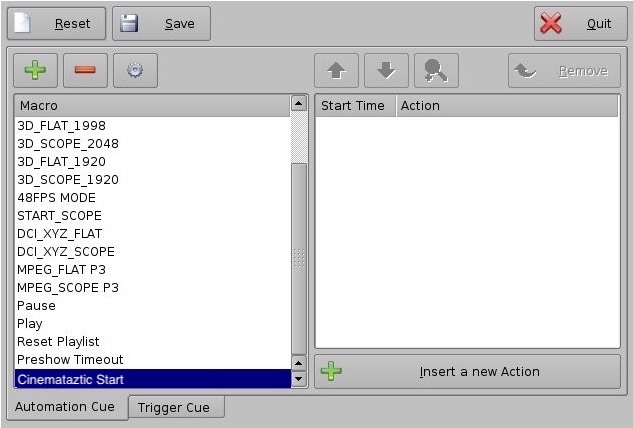
2. Macro setup
The content playlists on the Cinemataztic machines can have several “targets” e.g. “adults” or “family”, which can be used to trigger different content types in front of different shows. This is achieved by including a target in the cue to the Cinemataztic machine in the macro.
- Open Macro Editor: (Menu → Doremi Labs, Inc. → Macro Editor)
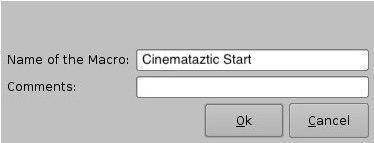
- Click the Add button (+)
- Give the cue a name (e.g. Start_cinemataztic)
- Description (e.g. start Cinemataztic show on CinemaTaztic DCH-P)
- Click OK
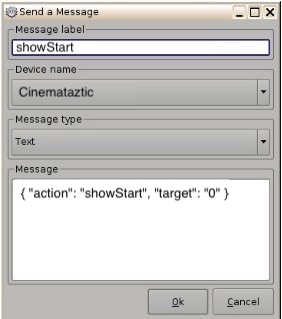
- Select the newly created Automation Cue and click Insert a new Action
- Choose Send Message
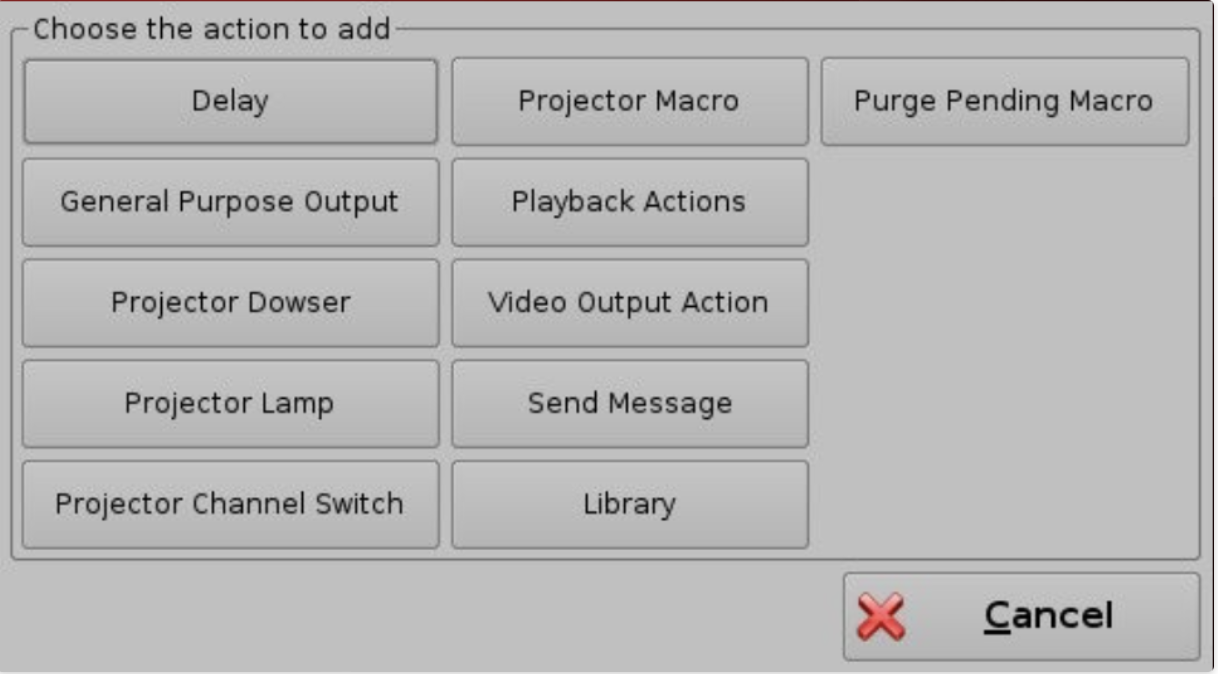
- Set Message label to e.g. “showStart”
- Choose Cinemataztic in the Device name dropdown
- Set Message type to Text
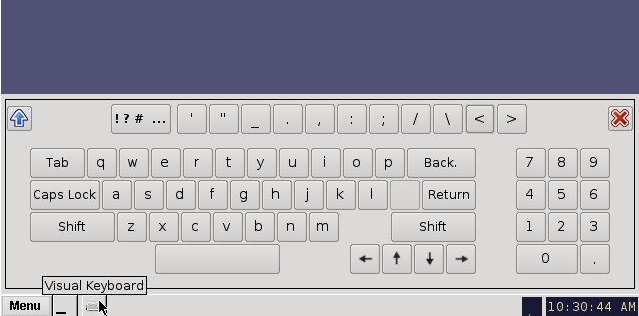
- Use Doremi’s virtual keyboard to create the curly braces { } used in the message and be sure the
" "are formatted correctly (not as“ “).